
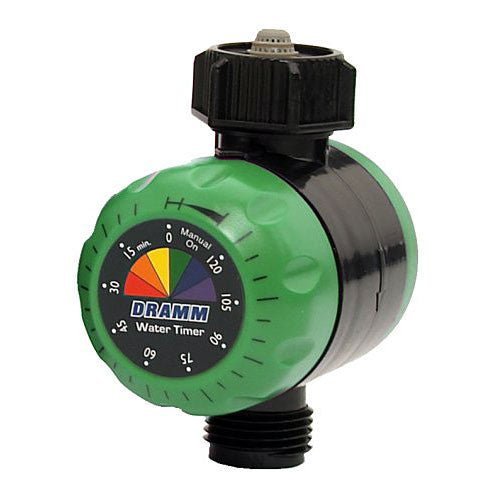
A mechanical water timer is a simple hose-end device that turns water on immediately and shuts it off after a selected amount of time. It is useful for sprinklers, soaker hoses, drip systems, newly planted shrubs, and other outdoor watering jobs where you want to avoid leaving a faucet running too long.
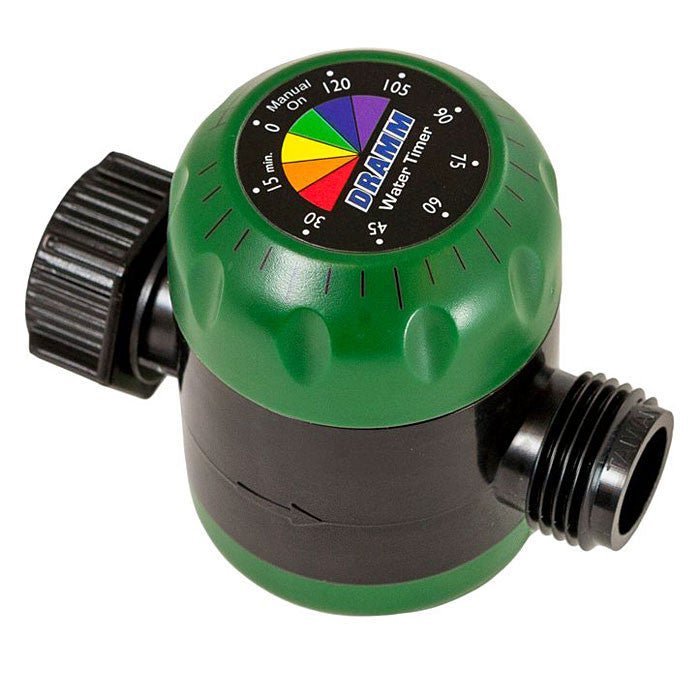
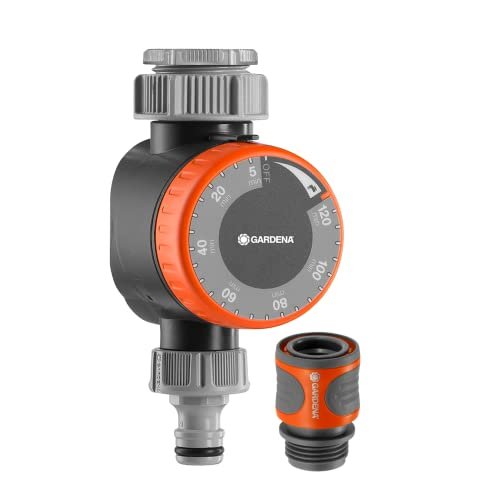
Unlike electronic timers, a mechanical water timer usually needs no batteries, programming, or electrical connection. You set the run time by turning a dial, and an internal spring-driven mechanism closes the valve when the countdown ends. That simplicity makes these timers practical for occasional watering, temporary irrigation, and homeowners who prefer a straightforward manual control.
The main limitation is equally important: most mechanical timers are not automatic schedulers. They can stop water after one watering cycle, but they generally will not start watering again tomorrow morning. Choosing the right type and using it correctly helps prevent dry plants, wasted water, leaks, and water pressure problems.
How a Mechanical Water Timer Works
A mechanical water timer attaches between an outdoor faucet and a garden hose, irrigation hose, or sprinkler connection. Water from the faucet flows through the timer when its internal valve is open.
To use it, you usually turn on the faucet fully, then rotate the timer dial to the desired watering duration. The timer opens the water path and begins counting down. When the selected period ends, the internal mechanism closes the valve and stops the flow.
Most models use a spring-operated clockwork mechanism. As the spring slowly unwinds, it moves the valve toward the off position. Because the device relies on a physical mechanism rather than electronics, it does not need batteries or a nearby outlet.
Common mechanical timer designs
Mechanical water timers are available in a few basic formats. Their controls may look different, but their purpose is similar.
- Simple countdown timers: Turn the dial to select a watering duration. These are the most common option for a single hose or sprinkler.
- Manual-plus-timer models: Include a manual on setting that allows continuous water flow until you return the dial to a timed setting or off position.
- Multi-outlet timers: Split one faucet into two or more timed hose connections. Each outlet may have its own dial, depending on the design.
- Mechanical faucet shutoff timers: Designed mainly to prevent accidental overwatering during hand watering, filling a small pond, or running a sprinkler.
Read the manufacturer instructions for the specific timer before installation. Dial direction, maximum run time, manual settings, and compatibility with irrigation accessories vary by model.
When a Mechanical Water Timer Is the Right Choice
A mechanical water timer works best when you need a one-time watering cycle and can return later to set the next one. It is especially useful for people who tend to forget a running sprinkler or want a low-maintenance way to control watering while doing yard work.
Good uses include:
- Running a lawn sprinkler for a planned period.
- Watering vegetable beds with a soaker hose.
- Giving newly planted trees or shrubs a slow, controlled soak.
- Operating a drip line during an afternoon gardening session.
- Preventing an unattended hose from running for hours.
- Controlling watering at a cabin, rental property, or basic outdoor faucet where electrical power is not convenient.
It is less suitable for irrigation that must run automatically on a recurring schedule. If you are away from home frequently, maintain a large landscape, or need watering to begin before sunrise several days per week, a battery-powered digital hose timer or a permanently installed irrigation controller may be a better fit.
Mechanical timer versus electronic timer
| Feature | Mechanical Water Timer | Electronic Hose Timer |
|---|---|---|
| Power source | Usually spring-driven; no batteries needed | Typically battery-powered |
| Watering schedule | One timed cycle started manually | Can usually start and repeat programs automatically |
| Ease of use | Very simple dial-based operation | Requires setup of start times, duration, and frequency |
| Best for | Occasional watering and shutoff protection | Regular irrigation when no one is present |
| Potential drawback | Must be reset for each watering event | Batteries, programming errors, and electronics can add complexity |
Neither type is automatically better. The practical question is whether you need a timer to stop today’s watering or to start and stop watering repeatedly on its own.
Choosing the Best Mechanical Water Timer for Your Yard
Mechanical timers may look nearly identical at first glance, but small differences affect how well they work with your hose, faucet, and watering method. Focus on fit, control range, flow needs, and outdoor durability rather than choosing by dial appearance alone.
Check the connection type
For most U.S. homes, a hose-end timer should connect to a standard outdoor spigot and accept a standard garden hose fitting. Even so, inspect your faucet and hose ends before buying. Damaged threads, bent fittings, or worn washers can cause dripping regardless of timer quality.
If you use drip irrigation, you may need additional components downstream of the timer, such as a backflow prevention device, filter, and pressure regulator. Drip tubing and emitters commonly operate at lower pressure than a typical hose bib supplies. Use parts designed for your irrigation system and follow their installation guidance.
Consider the maximum timer range
Some timers are intended for short tasks, while others provide a longer watering window. A short-range timer may be ideal for a small patio container or hand-held sprinkler but inadequate for slow watering around a tree root zone.
Choose a run-time range that matches your typical task. Avoid routinely setting a timer at its extreme limit if you often need longer irrigation. A different watering method, larger timer range, or scheduled controller may be more dependable for that job.
Match the timer to the watering method
High-flow sprinklers, soaker hoses, and drip systems behave very differently. A timer only controls how long water flows; it does not correct poor coverage, runoff, clogged emitters, or excessive pressure.
- Oscillating or impact sprinklers: Useful for turf and broad planting areas, but check for uneven coverage and overspray onto pavement.
- Soaker hoses: Best for slow watering along garden rows and foundation plantings. They need time to wet the soil gradually.
- Drip irrigation: Efficient for targeted root-zone watering, containers, and beds, provided the system has proper filtration and pressure control.
- Tree watering bags or basins: May need a low, slow flow to avoid erosion and runoff around the root ball.
Look for practical outdoor durability
A timer installed outside may face heat, sunlight, rain, hose pulling, and accidental bumps. A sturdy housing, easy-to-grip dial, secure hose connections, and replaceable washers are useful features. Protecting the timer from direct sun and physical damage can extend its service life.
Do not assume a timer is freeze-proof. Freezing water can crack internal parts, fittings, and connected hoses. Remove and drain it before sustained freezing weather.
How to Install and Use a Mechanical Water Timer
Installation is normally quick, but careful setup prevents many common leaks and performance issues. Start with a faucet that is in good condition and easy to access.
- Turn the faucet off. Make sure no water is flowing before attaching the timer.
- Inspect the rubber washer. Confirm that the timer’s inlet washer is present, clean, and seated properly. Replace a flattened, cracked, or missing washer.
- Thread the timer onto the faucet by hand. Keep it straight to avoid cross-threading. Hand-tighten firmly, but do not force plastic fittings.
- Attach the hose or irrigation connector to the timer outlet. Check that the hose washer is also in good condition.
- Turn on the faucet. Many mechanical timers require the faucet to remain on so the timer can control the flow. Open it gradually and inspect for leaks.
- Set the dial. Rotate it according to the timer instructions to begin the desired watering duration.
- Confirm water is flowing where it should. Check sprinkler coverage, drip emitters, or soaker hose output before walking away.
- Check the shutoff on the first few uses. Verify that the timer closes properly at the end of the cycle.
Do not use pliers to overtighten a plastic timer body unless the manufacturer specifically directs it. Excess force can crack a fitting or damage threads. If a connection drips, turn off the faucet, relieve pressure, and inspect the washer and threads rather than tightening repeatedly.
Credit: eartheasy.com
Set the faucet correctly
For a timer to work consistently, the faucet usually needs to stay on while the timer manages the downstream flow. A partially open faucet may reduce sprinkler distance, affect drip-system performance, or create inconsistent output.
However, more flow is not always better. If a sprinkler creates runoff or a drip system blows apart, the problem may be excessive water pressure, incorrect components, or poor system design. Reduce flow only if your equipment instructions allow it, and address the underlying setup instead of relying on the timer dial.
How Long Should You Run It?
The correct timer setting depends on what you are watering, the soil, weather, sun exposure, and how quickly the system applies water. There is no single number that works for every lawn, garden, or landscape bed.
Instead of choosing a duration by habit, observe the soil and adjust. The goal is to moisten the active root zone without sending water down the driveway, into storm drains, or below roots where plants cannot use it efficiently.
For lawns
Established turf generally benefits from deeper, less frequent watering rather than frequent light sprinkling, but the ideal amount varies by grass type, rainfall, soil, heat, and local restrictions. Sandy soil takes in water quickly but dries faster. Clay soil absorbs more slowly and is more likely to produce runoff if watered too fast.
Use a few straight-sided containers placed across the sprinkler zone to see whether coverage is even. Run the system briefly, measure the collected water, and use that result to estimate how long the sprinkler needs to operate. If water begins to puddle or run off, use shorter cycles separated by a soaking period rather than one long continuous run.
Cool-season grasses may need more support during hot, dry weather, while warm-season lawns have different seasonal growth patterns and may slow down when temperatures are too cool. Local Cooperative Extension guidance can help align watering with your grass species and climate.
For vegetable gardens and flower beds
Water at the soil level whenever practical. Soaker hoses and drip lines can reduce wet foliage and deliver moisture close to plant roots. Check soil a few inches below the surface rather than judging only by dry-looking mulch or crusted topsoil.
New seedlings and shallow-rooted plants may need more frequent attention than established plants, especially during heat or windy weather. On the other hand, constantly saturated soil can reduce oxygen around roots and encourage disease problems. Adjust timer duration as plants mature and weather changes.
For trees and shrubs
Recently planted trees and shrubs need consistent moisture while their roots establish, but they should not sit in waterlogged soil. A slow soak around the root zone is generally more useful than spraying the leaves for a few minutes.
Place water where roots can use it, typically around and beyond the original root ball as the plant establishes. Mulch can help conserve moisture, but keep it away from direct contact with trunks and stems. For valuable or stressed trees, local arborist or Extension advice is worthwhile because watering needs vary with species, soil drainage, planting date, and weather.
Best Practices for Efficient, Safe Watering
A mechanical water timer prevents one common mistake—forgetting to shut off the water—but good irrigation still depends on observation and maintenance.
- Water early when practical. Morning watering often reduces evaporation compared with the hottest part of the day and allows foliage to dry after overhead watering.
- Watch for runoff. Water flowing onto sidewalks or down slopes is not reaching plant roots. Reduce the application rate, divide watering into cycles, or improve coverage.
- Keep water off hard surfaces. Adjust sprinklers so they do not routinely spray driveways, walls, windows, or neighboring property.
- Follow local water restrictions. Municipal schedules, drought rules, and seasonal restrictions differ by location. A timer does not exempt a property from local requirements.
- Protect drinking water. Use appropriate backflow prevention where required or recommended, particularly when connecting irrigation equipment, fertilizers, or other attachments to a potable-water faucet.
- Check the system periodically. Look for leaking fittings, split hoses, clogged emitters, tilted sprinklers, and damaged tubing.
- Keep children and pets away from equipment. Hoses, fittings, and irrigation lines can create trip hazards. Store loose equipment when it is not in use.
Credit: eartheasy.com
Do not use a timer to mask a drainage problem
If water remains on the soil surface long after irrigation ends, the issue may be compacted soil, heavy clay, poor grading, a low spot, or an excessive flow rate. Repeatedly reducing timer duration may leave plants under-watered without solving drainage.
For small areas, improving soil structure, applying mulch properly, redirecting a sprinkler, or using shorter soak cycles may help. Persistent standing water near a foundation, major slope erosion, or drainage that affects neighboring property may require a qualified landscape, drainage, or irrigation professional.
Common Mechanical Water Timer Problems and Fixes
Most timer problems are caused by simple installation, water-supply, or wear issues. Diagnose the easiest possibilities first.
The timer leaks at the faucet connection
Turn off the faucet and remove the timer. Check for a missing, worn, twisted, or dirty inlet washer. Clean the sealing surfaces and reinstall the timer straight. Also inspect the faucet threads for corrosion or damage.
If the timer housing itself is cracked, replacement is usually safer than trying to seal it. Do not rely on tape to repair a cracked pressurized component.
Water keeps flowing after the dial reaches off
A timer that does not shut off may have an internal valve problem, debris in the valve, a worn mechanism, or freeze damage. First, turn off the faucet manually to stop the water. Then consult the manufacturer instructions to see whether cleaning or service is supported.
Do not leave a faulty timer connected and unattended. Replace it if it cannot reliably close, especially where uncontrolled water could damage a foundation, flood a bed, or waste significant water.
Water does not flow when the timer is set
Make sure the faucet is turned on, the timer is not already at the end of its cycle, and the hose is not kinked. Check whether a downstream spray nozzle, sprinkler, filter, pressure regulator, or drip component is blocked.
Remove restrictions one at a time to identify where the flow stops. If the timer has been stored through freezing weather or has visible damage, its internal valve may no longer operate correctly.
The sprinkler has weak pressure
Weak sprinkler output can come from a partially open faucet, kinked hose, clogged sprinkler nozzle, long hose run, low supply pressure, or too many devices connected to one faucet. The timer may add some flow restriction, but it is not always the cause.
Test the sprinkler briefly without the timer only if it is safe to do so. If pressure improves substantially, verify that the timer is appropriate for the intended flow and inspect it for obstruction. If pressure remains poor, check the hose and sprinkler system instead.
Seasonal Care and Storage
Mechanical water timers last longer when they are removed before freezing temperatures arrive. Water trapped inside can expand as it freezes and damage internal seals, housings, or valve components.
- Turn off the outdoor faucet.
- Disconnect the timer from the faucet and hose.
- Drain water from the timer according to the manufacturer instructions.
- Allow it to dry before storing it in a protected location.
- Inspect washers, threads, and the dial before reinstalling it in spring.
If your home has a frost-free outdoor faucet, follow its winterization requirements as well. Hoses and timers left connected can interfere with proper drainage and may contribute to freeze damage. In mild climates, periodic inspection still matters because sun exposure, mineral deposits, and worn washers can affect performance over time.
Credit: amazon.com
FAQ
Can a mechanical water timer run every day automatically?
Most mechanical water timers cannot. They normally begin a single watering cycle when you turn the dial and shut off when that cycle ends. For daily, every-other-day, or weekly scheduling, use an electronic hose timer or an irrigation controller designed for recurring programs.
Should the outdoor faucet stay on while the timer is attached?
Usually, yes. The faucet must generally remain on for the timer to control water flow to the hose or irrigation system. Check the instructions for your model, and turn the faucet off when the timer is not being used for an extended period or when freezing weather is expected.
Will a mechanical timer work with a drip irrigation system?
It can work for manually started drip watering. The timer controls the watering duration, but drip systems may also need a filter, pressure regulator, and backflow prevention device compatible with the tubing and emitters. The timer will not create a repeating irrigation schedule by itself.
Why does my mechanical timer make a ticking sound?
A quiet ticking sound is normal for many spring-driven timers because the internal clockwork mechanism is counting down. A loud grinding sound, sticking dial, or failure to shut off is not normal and may indicate wear, debris, or internal damage.
Can I leave a mechanical water timer outside all winter?
It is not a good idea in locations that experience freezing temperatures. Disconnect, drain, and store the timer indoors or in another protected frost-free area. Even a small amount of trapped water can freeze and damage the timer’s internal parts or fittings.