
A digital water timer automates outdoor watering by opening and closing a hose-connected valve on a schedule. It can simplify irrigation for lawns, garden beds, containers, drip systems, and newly planted shrubs while reducing the risk of forgotten sprinklers and unnecessary runoff.
The best results come from more than setting a daily start time. A timer must match the water source, watering method, plant needs, and local weather. Programming a drip system for vegetable beds requires a different approach than running a sprinkler for established turf.
This guide explains how digital timers work, how to choose and install one, practical programming techniques, and the common issues that prevent a system from watering correctly.
How a Digital Water Timer Works
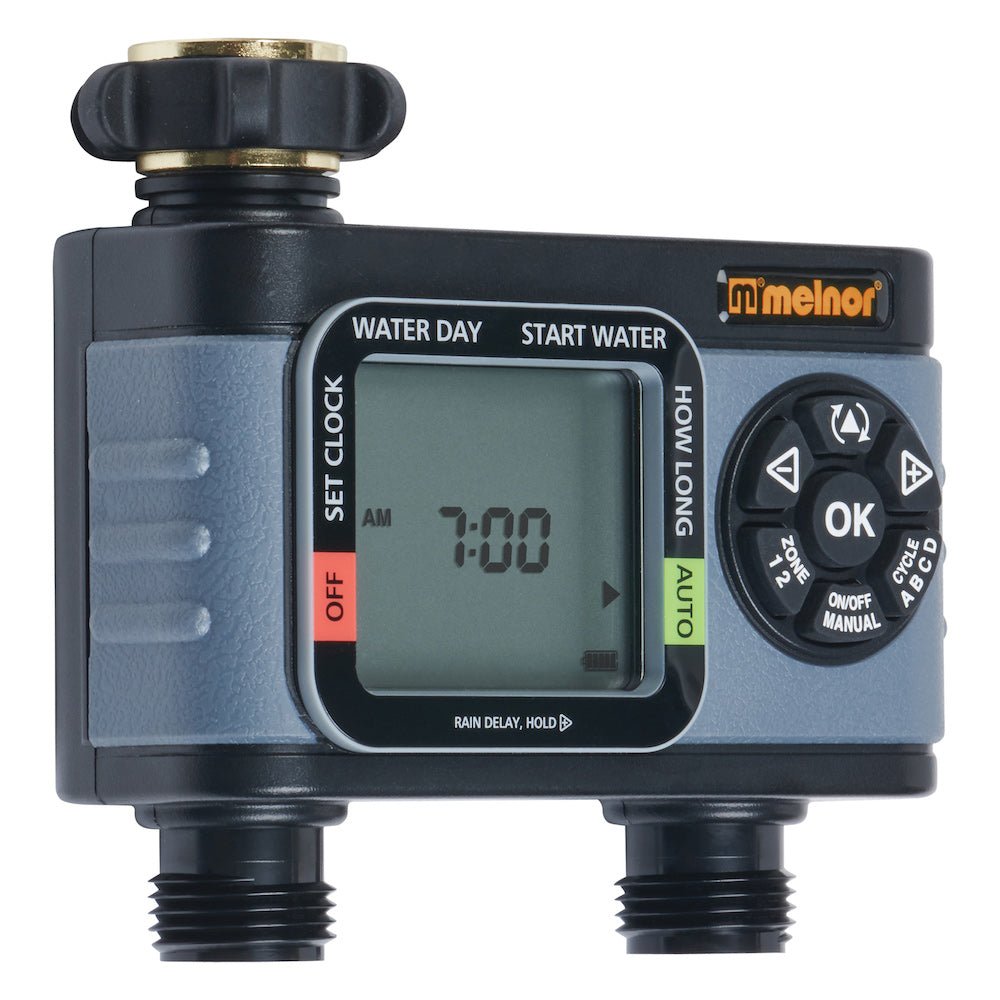
Most digital water timers attach between an outdoor faucet and a garden hose, so they do not require a permanently installed irrigation system. Battery-powered controls operate an internal valve. At the programmed time, the valve opens; when the selected run time ends, it closes.
A typical setup includes:
- Faucet inlet: Connects to a standard outdoor spigot.
- Outlet or outlets: Connect to a hose, soaker hose, sprinkler, or drip irrigation adapter.
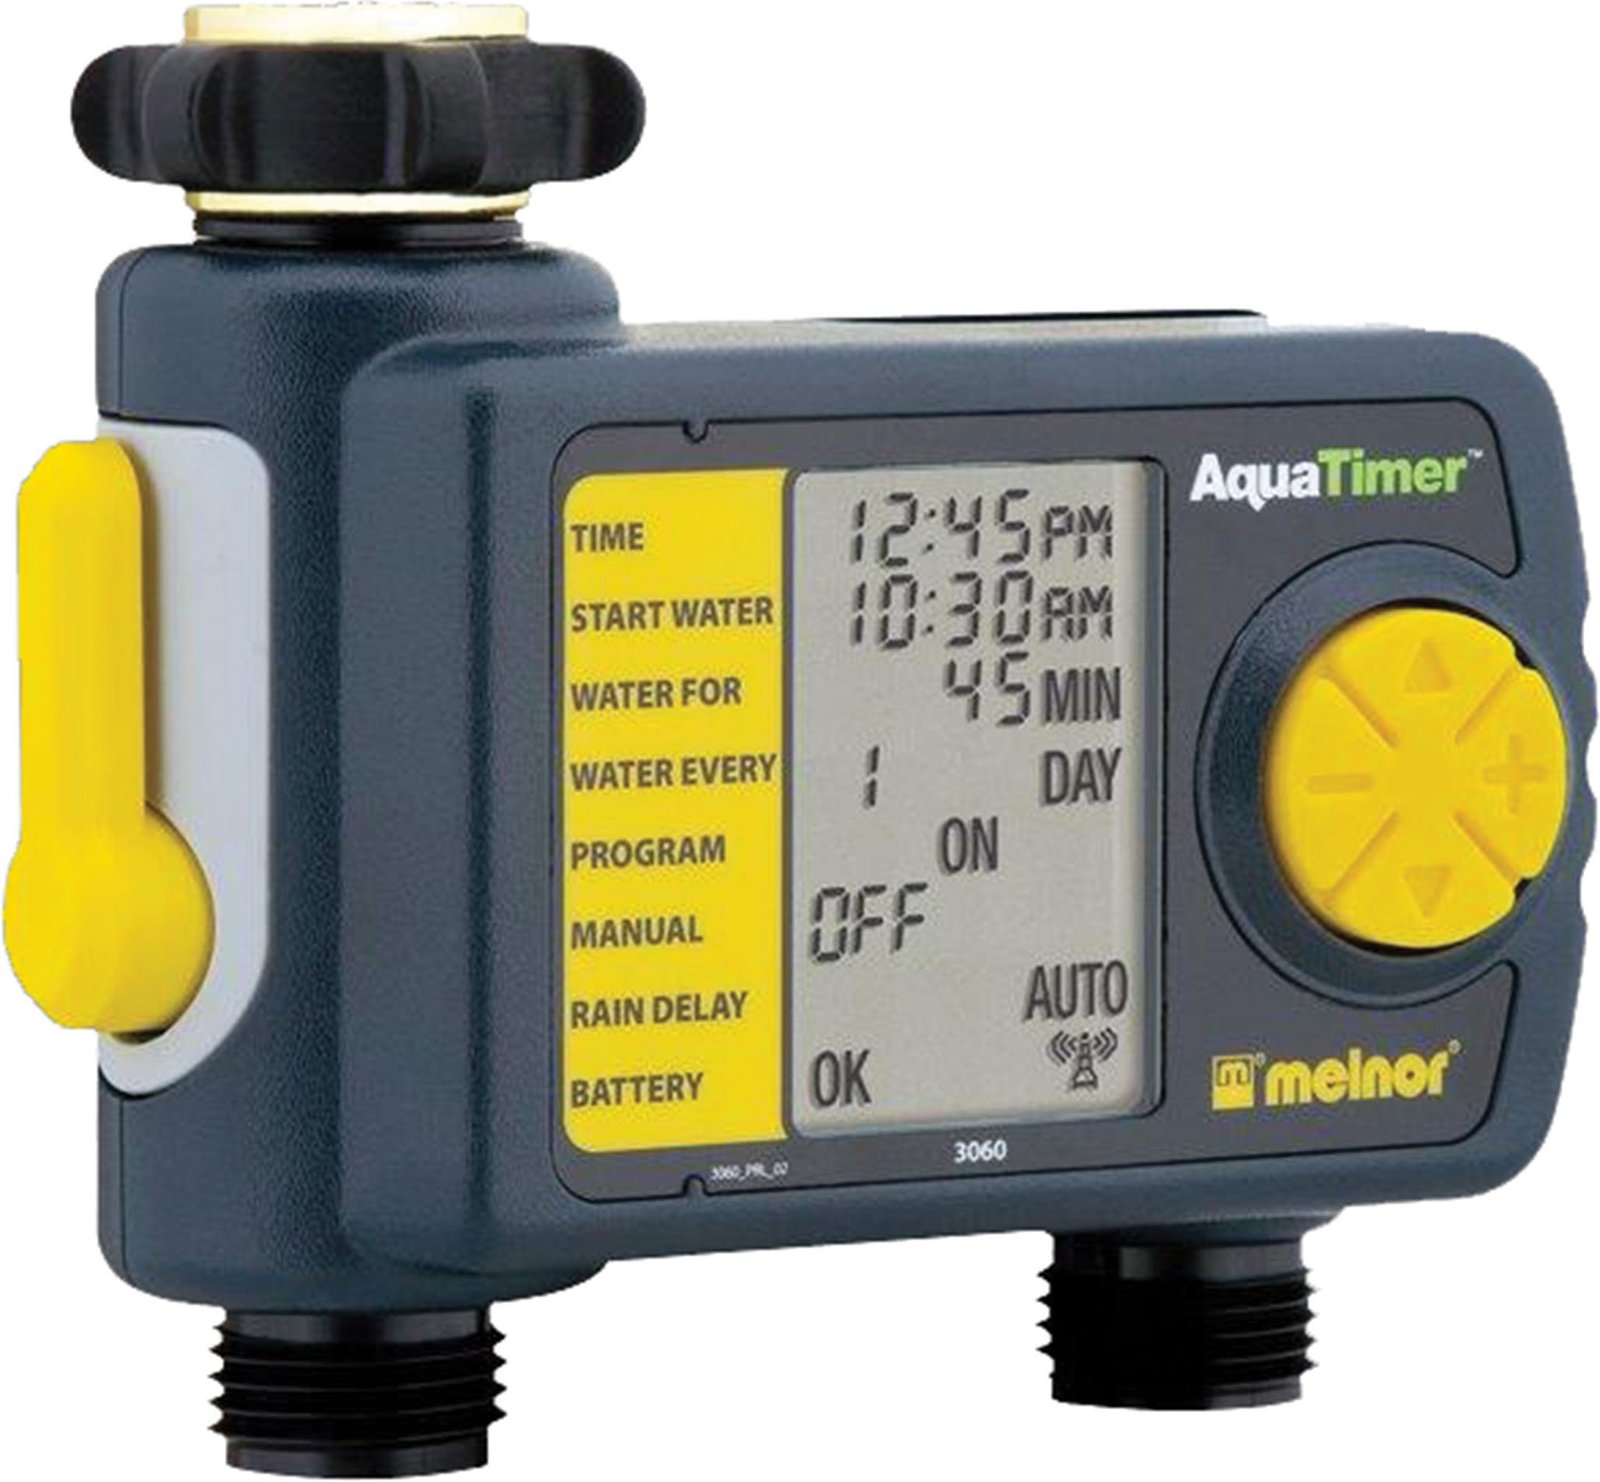
- Digital control panel: Used to set the clock, start times, watering duration, and watering days or intervals.
- Internal valve: Starts and stops water flow automatically.
- Battery compartment: Powers the display and valve operation on most hose-end models.
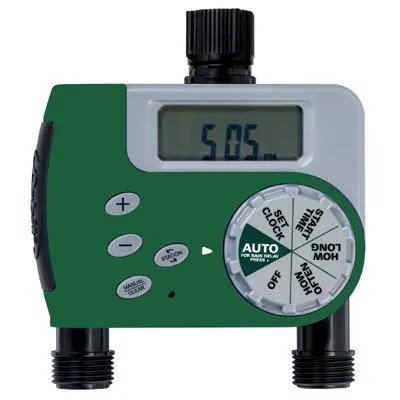
Single-outlet timers operate one watering zone. Two-outlet timers can run two separate zones, such as a lawn sprinkler on one outlet and a drip line for containers on the other. Some models allow independent schedules for each outlet, while others offer more limited control. Check the manufacturer’s documentation before assuming both outlets can run at different times or support multiple daily cycles.
Where a Timer Makes the Most Sense
Digital timers are most useful where watering is repeated, predictable, and time-consuming to manage by hand. They do not replace observation, but they make consistent watering much easier.
Garden beds and raised beds
Drip irrigation paired with a timer is often a practical choice for vegetables, flowers, and shrubs. It applies water closer to the root zone, keeps foliage drier than overhead sprinklers, and can reduce evaporation. Use pressure regulation and filtration when the drip system manufacturer calls for them; ordinary hose pressure may damage fittings or cause uneven flow in some drip systems.
Containers and hanging baskets
Containers dry faster than in-ground beds, especially in sun, wind, and hot weather. A timer connected to a small drip setup can make daily watering more reliable. Still, container plants can need adjustments after heat waves, storms, or changes in plant size. Check soil moisture rather than assuming one schedule will work all season.
New plantings
Recently planted trees, shrubs, and perennials need steady root-zone moisture while they establish. A timer can help prevent accidental drought stress, but it should not run unattended for weeks without inspection. Check that water reaches the root ball, not just the surrounding soil, and adjust as roots spread.
Lawns
A timer can manage movable sprinklers or hose-end sprinkler systems for small and medium lawn areas. For established turf, deeper and less frequent watering is generally more useful than brief daily sprinkler cycles, assuming the soil can absorb the water without runoff. The correct frequency depends on grass type, soil texture, recent rainfall, temperature, shade, and local water restrictions.
Choosing the Right Digital Water Timer
Before buying a timer, decide what it needs to control. The least expensive option may be adequate for one soaker hose, but a more flexible timer can be worthwhile when different areas have very different watering needs.
| Feature | Best for | What to consider |
|---|---|---|
| Single outlet | One hose, sprinkler, or drip zone | Simple setup, but all connected plants receive the same schedule. |
| Two outlets | Separate lawn and garden zones | Confirm whether each outlet has fully independent programming. |
| Multiple start times | Short-cycle watering or separate daily events | Useful for drip systems and for reducing runoff on slopes. |
| Rain delay | Areas with changing weather | Allows temporary suspension without deleting the schedule. |
| Manual watering button | Spot watering and testing | Lets you run water immediately without changing the programmed cycle. |
| Weather-connected controls | Users who want app-based scheduling | May require Wi-Fi, a compatible app, reliable signal, and occasional software updates. |
Match the timer to the watering method
Hose-end timers are generally designed for outdoor faucet use. They are not automatically suitable for every irrigation component. A drip system may need a filter, pressure regulator, tubing adapter, and backflow protection arrangement appropriate for the system and local plumbing rules.
For a sprinkler, consider the coverage area and flow demands. If the sprinkler produces weak coverage when connected directly to the faucet, adding a timer will not improve it. Low pressure, a kinked hose, restricted faucet flow, or an overloaded hose-splitting setup may be the actual problem.
Consider your water source and faucet condition
Inspect the spigot before installation. A worn washer, damaged threads, or a leaking frost-free faucet can create problems that a timer will not solve. If the faucet is difficult to turn, leaks from the stem, or has a damaged vacuum breaker, repair it before relying on automated watering.
Do not use a timer where freezing temperatures are likely unless you can remove it and winterize the faucet and hoses. Water trapped inside a timer can freeze, expand, and damage internal parts.
How to Install a Digital Water Timer
Installation is usually straightforward, but careful setup reduces leaks and prevents schedule failures. Begin with fresh batteries of the type specified by the timer manufacturer. Replace weak batteries before a hot, dry period rather than waiting for the display to fade.
- Turn off the outdoor faucet. Remove any existing hose, splitter, or nozzle.
- Inspect the timer washers. Make sure the inlet washer is seated properly and free of cracks or debris.
- Thread the timer onto the faucet by hand. Avoid cross-threading. Hand-tighten firmly, but do not force plastic fittings with pliers.
- Connect the hose or irrigation adapter to the timer outlet. Use a washer at the hose connection to prevent leaks.
- Open the faucet fully. The faucet normally remains on while the timer controls water flow. Opening it only partly can reduce sprinkler performance or create inconsistent operation.
- Test the connection manually. Run a brief manual cycle and inspect every connection for drips, sprays, or loose fittings.
- Program the schedule. Set the current time first, then choose start time, run time, and watering days or interval.
If a connection leaks, turn off the faucet, relieve pressure, and inspect the washer. Tightening harder is not always the answer. A flattened washer, cracked connector, or cross-threaded fitting often needs replacement.
Credit: melnor.com
Programming Techniques That Water More Effectively
A digital water timer is only as effective as its schedule. Start with the needs of the plants and the performance of the watering device, then make small adjustments based on real soil moisture and weather.
Water early when practical
Early morning is often a sensible watering window. Temperatures are usually lower, wind may be lighter, and foliage has time to dry after overhead irrigation. This can reduce water loss and avoid leaving leaves wet through the night. Local watering rules may limit approved days or hours, so check your municipality or water provider before setting a schedule.
Use duration to match soil and emitter output
Run time should be based on how quickly water reaches the desired root depth without pooling or running off. Clay soil often absorbs water slowly but holds moisture longer. Sandy soil absorbs water quickly and drains faster. A single schedule cannot serve both equally well.
For drip irrigation, emitter flow rate, spacing, and the number of emitters per plant all influence run time. For sprinklers, perform a simple catch-can test if you need to understand coverage: place several straight-sided containers around the watered area, run the system, and compare how much water reaches each location. Uneven results may point to poor sprinkler placement, pressure problems, or obstructions rather than a programming issue.
Use cycle-and-soak watering on slopes or compacted soil
If water begins flowing down a slope, across a driveway, or into a storm drain before soaking in, reduce the length of each watering event. Instead of one long cycle, use shorter cycles separated by a pause so the soil can absorb water.
For example, a timer with multiple start times may run a zone briefly, pause, and then run again later in the morning. The right cycle length varies with soil, slope, sprinkler output, and ground cover. Watch the first few cycles and shorten the run time if runoff begins.
Program zones by plant need, not convenience
Plants with different water needs should not share one zone when it can be avoided. Lawn grass, drought-tolerant perennials, vegetables, and hanging baskets often require different timing and delivery methods. A two-outlet digital water timer can help separate high-demand containers from lower-demand landscape beds.
Do not attach many unrelated hoses to one timer through a basic splitter and expect balanced watering. Flow can vary widely between branches, especially when hose lengths, sprinkler types, elevation, and restrictions differ.
Change schedules with the season
Automated watering should not be “set and forget.” Plants generally use more water during hot, dry, windy conditions and less during cool, rainy weather. Established lawns and landscape plants may need little or no supplemental irrigation during rainy periods. Pause the schedule after meaningful rainfall when soil moisture is adequate.
During cooler weather, reduce run times or frequency before the soil stays constantly wet. Overwatering can encourage shallow roots, nutrient leaching, and some plant disease problems. It can also waste water just as quickly as underwatering harms plants.
Using a Digital Water Timer With Drip Irrigation
Drip irrigation is one of the most efficient uses for a hose-end timer, provided the system is designed for the available water pressure and flow. A basic layout usually starts at the faucet and may include a backflow prevention device, timer, filter, pressure regulator, hose-thread adapter, mainline tubing, and emitters or dripline.
The exact order can vary by component design, so follow the instructions supplied with the timer, regulator, filter, and irrigation kit. Do not assume all accessories are interchangeable.
Credit: wedels.com
Check for uniform flow
After installation, turn the system on manually and walk the full line. Look for:
- Disconnected tubing or loose fittings
- Emitters that are clogged, missing, or spraying
- Kinked tubing
- Water pooling around one plant while another stays dry
- Leaks at the hose-thread connections
- End caps that have come loose
Flush tubing as recommended by the system manufacturer, especially after installation or when debris may have entered the line. A filter helps protect small drip passages, but it also needs periodic cleaning.
Avoid watering the wrong place
Position emitters near the active root zone, not against the stem or trunk. For young plants, that may be close to the root ball. For established shrubs and trees, water should be distributed over a broader area as roots extend outward. Keep water away from building foundations unless the landscape design specifically accounts for drainage there.
Common Digital Water Timer Problems and Fixes
The timer does not turn on
Start with the simplest causes. Confirm that the current time, start time, run duration, and watering day settings are correct. A timer set for 6:00 p.m. will not run at 6:00 a.m., and an interval schedule may not begin until its next programmed day.
- Install fresh batteries in the correct orientation.
- Check that the faucet is fully open.
- Make sure the timer is not in rain-delay, off, or manual-only mode.
- Verify that the desired outlet is programmed on a multi-outlet model.
- Reset and reprogram the timer if the display or schedule behaves erratically, following the manual.
Water flows, but sprinkler coverage is poor
Weak coverage is commonly a flow or pressure issue rather than a timer failure. Test the sprinkler directly from the faucet if practical. Inspect hoses for kinks, crushed sections, leaks, and restrictive connectors. Avoid operating more sprinklers than the faucet can supply effectively.
Also check placement. A sprinkler blocked by tall grass, shrubs, patio furniture, or a fence may leave dry patches even when pressure is adequate.
The timer leaks at the faucet or hose outlet
Turn off the faucet before disassembling the connection. Check for a missing, worn, or twisted washer. Clean grit from the threads and reconnect by hand. Replace cracked plastic connectors or damaged hoses rather than trying to seal them with excessive thread tape or overtightening.
The timer opens but does not shut off
Use the manual override or turn off the faucet if the timer will not close. Then remove the timer after relieving pressure and inspect it according to the manufacturer’s instructions. Debris in the valve, depleted batteries, internal damage, or freeze damage can interfere with operation. If cleaning and battery replacement do not solve the problem, replacement or manufacturer support may be safer than attempting to disassemble a sealed valve body.
Maintenance, Safety, and Winter Storage
Inspect the timer and irrigation setup regularly during the watering season. A short weekly walk-through can catch a leaking fitting, chewed tubing, clogged emitter, or dead battery before plants go dry or water runs for hours unnoticed.
- Replace batteries at the beginning of the season and whenever the display indicates low power.
- Keep the control panel and battery compartment dry and properly closed.
- Clean screens, filters, and drip components according to the manufacturer’s directions.
- Check hoses for sun damage, kinks, and weak couplings.
- Use the timer’s rain-delay function when rainfall makes scheduled watering unnecessary.
- Keep irrigation water and connections away from electrical outlets, extension-cord connections, and outdoor electrical equipment.
Before freezing weather, turn off the faucet, disconnect the timer, drain it, and remove the batteries if the manufacturer recommends it. Drain hoses and irrigation lines as appropriate for the system. In cold climates, winterizing outdoor plumbing may require shutting off the interior supply to the faucet and draining the line; follow your home’s plumbing setup and local guidance.
Credit: amazon.com
When a Hose-End Timer Is Not Enough
A digital water timer is convenient, but it has limits. Large properties, multiple sprinkler zones, buried irrigation systems, steep slopes, and complex landscapes may be better served by a dedicated irrigation controller and professionally designed zones.
Consider professional irrigation help if you have persistent low pressure, major leaks, unexplained wet spots, suspected underground pipe damage, repeated backflow concerns, or a system that needs electrical work. Contact a qualified professional before altering plumbing connections beyond a simple hose-end setup, particularly where local backflow prevention rules apply.
Frequently Asked Questions
Can a digital water timer be left outside in the rain?
Many outdoor timers are designed to tolerate normal weather exposure, but the level of weather resistance varies by model. Keep the battery compartment sealed, avoid placing the timer where it will be submerged or repeatedly hit by heavy spray, and follow the manufacturer’s storage instructions.
Do digital water timers work with soaker hoses?
Yes, a timer can operate a soaker hose. Run time should be adjusted carefully because soaker hoses release water slowly and can distribute unevenly on slopes or long runs. Check moisture along the hose rather than assuming every section receives the same amount of water.
How long do batteries usually last in a water timer?
Battery life depends on the timer design, battery type, temperature, and how often the valve operates. Start each season with fresh batteries, keep a spare set available, and replace them promptly when the low-battery indicator appears.
Can I use one timer for a lawn sprinkler and a vegetable garden?
You can if the timer has independently programmable outlets and each zone has compatible flow demands. In most cases, a lawn sprinkler and vegetable drip system need different run times and watering frequencies, so separate zones are preferable.
Should I turn off my timer when rain is forecast?
A forecast alone does not always mean irrigation should stop, since rainfall amounts can vary widely. Use a rain-delay feature when sufficient rain has fallen or is very likely, then check soil moisture before resuming the normal schedule.